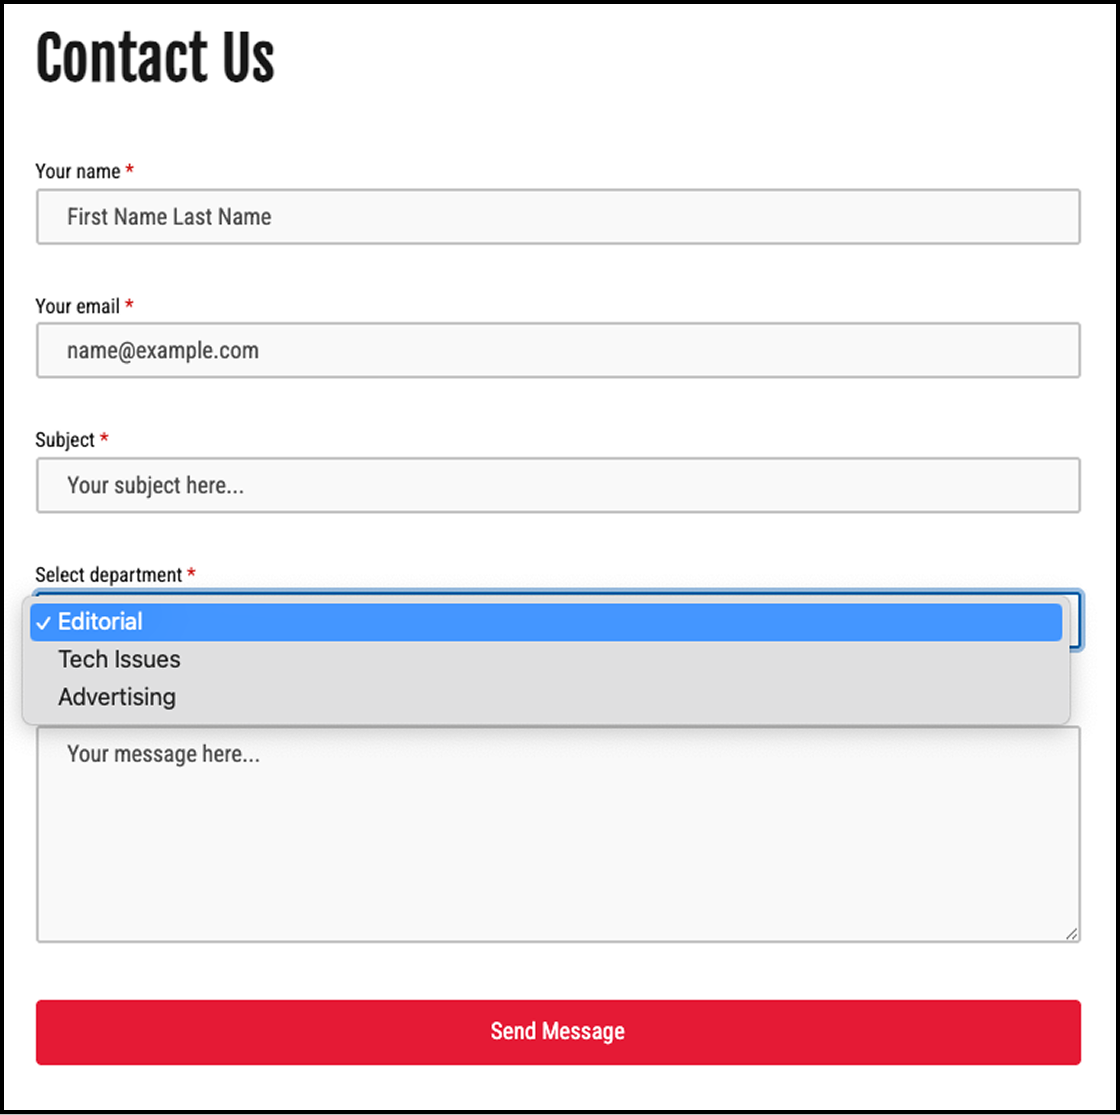
The Contact Us Form block is a custom block that integrates Web3Forms to display a contact form directly on any post or page of your website. This seamless integration provides a professional contact solution without visible third-party branding. It is fully responsive and automatically adapts to light and dark mode. A key feature of the Contact Us Form block is that is supports multiple destinations / departments. You can use a single form for editorial tips, ad inquiries, bug reports, etc.
Form Appearance
Before You Begin
Consider whether the Contact Us Form block meets your needs:
- ✅ Best for: General inquiries, feedback, and open-ended messages
- ❌ Not ideal for: Collecting specific structured data (e.g., addresses, sizes, detailed forms)
The form provides a general text field for messages rather than customizable specific fields.
Setup Instructions
Step 1: Obtain Web3Forms Access Key(s)
- Navigate to https://web3forms.com/
- Click Create Your Form
- Follow the registration process to generate your access key (free)
- Note: If you plan to use multiple departments, create separate access keys for each department
Step 2: Add the Contact Us Form Block
- Navigate to the post or page where you want to display the form
- Add the Contact Us Form block to your content
- The block sidebar will open automatically (if not, click the block to select it)
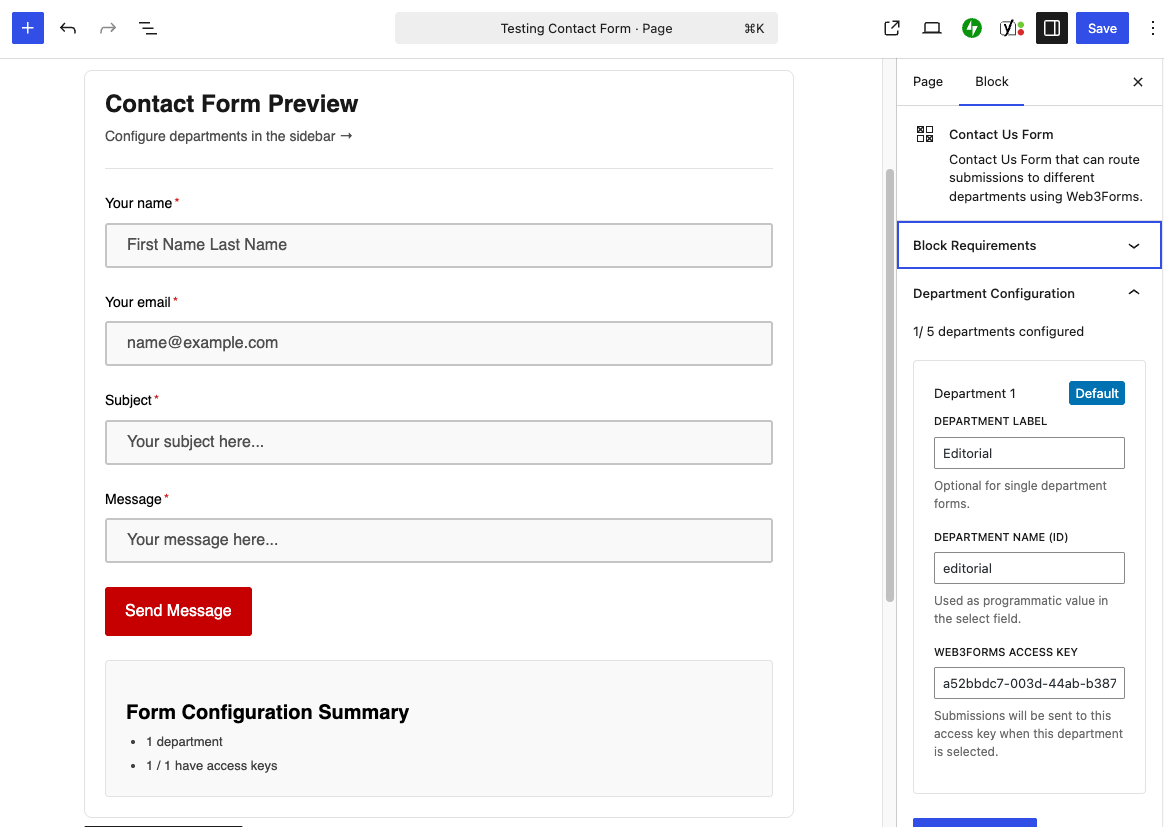
Step 3: Configure Your Form
Your configuration depends on whether you need a single destination or multiple departments:
Single Destination Setup
For a general contact form with one recipient:
- In the block sidebar, locate Department Configuration
- Scroll to Department 1 access key
- Paste your Web3Forms access key
- Leave Department Label and Department Name fields empty
- Save or update your post/page
Multi-Department Setup
For forms that route to different departments (e.g., Sales, Support, Editorial):
- In the block sidebar, locate Department Configuration
- For each department, configure:
- Department Label: User-facing name (e.g., “Sales Inquiries”)
- Department Name: Internal identifier
- Access Key: The corresponding Web3Forms access key
- Department Label: User-facing name (e.g., “Sales Inquiries”)
- Department Name: Internal identifier
- Access Key: The corresponding Web3Forms access key
- Add additional departments as needed
- Save or update your post/page
Step 4: Customize Your Page (Optional)
Since the Contact Us Form is a standard block, you can:
- Add introductory text above the form
- Include additional information or instructions below
- Combine with other blocks to create a complete contact page
Testing Your Form
Activation
The form becomes active immediately upon publishing—no additional activation steps required.
Testing Process
- Submit a Test Message
- Fill out the form as a visitor would
- Submit a test inquiry
- Fill out the form as a visitor would
- Submit a test inquiry
- Verify Email Delivery
- Sender Confirmation: The person submitting receives an acknowledgment
- Recipient Email: The email address associated with the access key receives the submission
- Sender Confirmation: The person submitting receives an acknowledgment
- Recipient Email: The email address associated with the access key receives the submission
- Check All Departments(if applicable)
- Test each department option to ensure proper routing
- Verify that emails reach the correct recipients
- Test each department option to ensure proper routing
- Verify that emails reach the correct recipients