The below review is focused on the overall appearance of your site, not related to your post or page content. You can customize the following areas of your Lede site:
Global Attributes
You can edit these global attributes by going to Appearance > Customize.
- Site Identity
- Update your logo, if needed.
- Note: Make sure to remove any excess padding from your logo file to ensure it displays in the full space allotted.
- Update your site title, tagline, and “About” information that displays in the site footer, if needed.
- Upload an “Alt logo” if your default logo has white in it. (Else your complete logo will not be visible in the site footer and on a few other pages.)
- Update your Site Icon (favicon), if needed. Favicon images should be square and have a minimum size of 512 x 512 pixels.
- Update your logo, if needed.
- Update your logo, if needed.
- Note: Make sure to remove any excess padding from your logo file to ensure it displays in the full space allotted.
- Note: Make sure to remove any excess padding from your logo file to ensure it displays in the full space allotted.
- Update your site title, tagline, and “About” information that displays in the site footer, if needed.
- Upload an “Alt logo” if your default logo has white in it. (Else your complete logo will not be visible in the site footer and on a few other pages.)
- Update your Site Icon (favicon), if needed. Favicon images should be square and have a minimum size of 512 x 512 pixels.
- Menus
- For configuring menus, see below. For more detail see, How to Create and Configure Site Menus.
- For configuring menus, see below. For more detail see, How to Create and Configure Site Menus.
- Homepage Settings
- For more detail, see Homepage Blocks Overview & Configuration.
- For more detail, see Homepage Blocks Overview & Configuration.
- Header
- You can ignore this option.
- You can ignore this option.
- Popout/Hamburger Menu
- You can ignore this option.
- You can ignore this option.
- Search
- You can ignore this option.
- You can ignore this option.
- Avatar
- You can ignore this option.
- You can ignore this option.
- Commenting
- You can ignore this option.
- You can ignore this option.
- Social Profiles and Sharing
- Social Media Links You may add your social media links here. These will be displayed in your site’s menu and footer. Supported platforms include Bluesky, Facebook, Instagram, LinkedIn, Pinterest, Threads, TikTok, Twitch, Twitter (X), and YouTube.
- If you are active on additional social networks which are not in the list above, we recommend that you create a “Follow Us” menu with links to your presence on these
- Social Sharing Select which platforms you will support for social sharing. The selected social networks will display on your site’s articles.
- Social Media Links You may add your social media links here. These will be displayed in your site’s menu and footer. Supported platforms include Bluesky, Facebook, Instagram, LinkedIn, Pinterest, Threads, TikTok, Twitch, Twitter (X), and YouTube.
- Social Media Links You may add your social media links here. These will be displayed in your site’s menu and footer. Supported platforms include Bluesky, Facebook, Instagram, LinkedIn, Pinterest, Threads, TikTok, Twitch, Twitter (X), and YouTube.
- If you are active on additional social networks which are not in the list above, we recommend that you create a “Follow Us” menu with links to your presence on these
- If you are active on additional social networks which are not in the list above, we recommend that you create a “Follow Us” menu with links to your presence on these
- Social Sharing Select which platforms you will support for social sharing. The selected social networks will display on your site’s articles.
- 404 Template
- You can ignore this option.
- You can ignore this option.
Global Styles
You can edit these global styles by going to Settings > Appearance in the Publisher App.
Colors
- Set your site’s primary, secondary, and accent brand colors by entering the Hex code for each color.
- Optional: Set your site’s global background color by entering the Hex code. This color only applies to light theme and must stand out against dark text. The default is white (no background color).
- Set your site’s dark theme primary and secondary brand colors by entering the Hex code for each color. Ensure these colors stand out against a dark background.
Typography
- Set your sites primary and secondary fonts.
- Set font weights for normal and bold text.
- Set text casing (sentence casing or UPPERCASE) for the following areas:
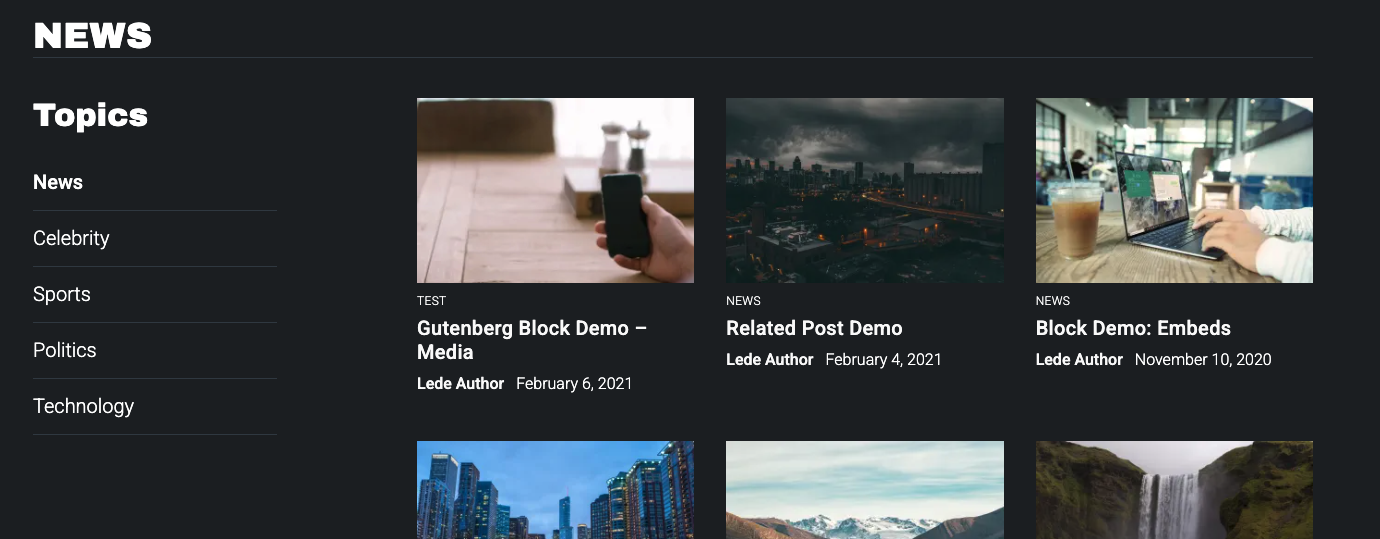
- Page headings on archive pages (category, tag, and the all posts page).
- Article page headlines.
- Article page recirculation module heading. This setting affects the heading in the article page recirculation module at the bottom of articles.
- Global Header and Menu Buttons. This setting affects the Subscribe and Login buttons in the global header and the popout menu.
- Page headings on archive pages (category, tag, and the all posts page).
- Article page headlines.
- Article page recirculation module heading. This setting affects the heading in the article page recirculation module at the bottom of articles.
- Global Header and Menu Buttons. This setting affects the Subscribe and Login buttons in the global header and the popout menu.
Archive Page with uppercase heading (NEWS).
Global Header buttons in uppercase.
Global Header Styles
- You may customize the style of the global header by setting colors for background, buttons, text, and border. You can also set logo size, logo location, and header decoration. Experiment with the available options to see what works best for your site.
- Logo:
- Default: Most logos look as expected & desired with this setting.
- Oversized: Logos that have an aspect ratio of less than 6:1 (i.e. 5:2, 4:1, etc.) or width/height is less than 6, will appear largest with this setting.
- This option should not be used in combination with the “angle” Header Decoration.
- Banner: Logos that have an aspect ratio of 6:1 or greater (i.e. 7:1, 15:2, etc.) or width/height is greater than or equal to 6, will appear largest with this setting.
- Note: Make sure to remove any excess padding from your logo file to ensure it displays in the full space allotted.
- Logo:
- Logo:
- Default: Most logos look as expected & desired with this setting.
- Oversized: Logos that have an aspect ratio of less than 6:1 (i.e. 5:2, 4:1, etc.) or width/height is less than 6, will appear largest with this setting.
- This option should not be used in combination with the “angle” Header Decoration.
- Banner: Logos that have an aspect ratio of 6:1 or greater (i.e. 7:1, 15:2, etc.) or width/height is greater than or equal to 6, will appear largest with this setting.
- Default: Most logos look as expected & desired with this setting.
- Oversized: Logos that have an aspect ratio of less than 6:1 (i.e. 5:2, 4:1, etc.) or width/height is less than 6, will appear largest with this setting.
- This option should not be used in combination with the “angle” Header Decoration.
- This option should not be used in combination with the “angle” Header Decoration.
- Banner: Logos that have an aspect ratio of 6:1 or greater (i.e. 7:1, 15:2, etc.) or width/height is greater than or equal to 6, will appear largest with this setting.
- Note: Make sure to remove any excess padding from your logo file to ensure it displays in the full space allotted.
Global Footer Styles
- Optional: Change the color of the border lines around the global footer.
Main Menu Styles
Experiment with the available options to see what works best for your site.
- You can adjust your Main Menu appearance, location, and/or format.
- See below for setting up the contents of your Main Menu.
Form Styles
- Optional: Change the style of buttons and select form fields.
Post and Pages Styles
- Optional: Change the color of the border below the Featured Image (or choose no border).
- Optional: Change the color of dividing border lines in article rivers and single articles.
- Optional: Change the style of the eyebrow (primary category) that appears above article titles on the article pages as well as on post cards throughout the site.
- Optional: Change the content of the recirculation module (article river) that displays below an article. Choose the most recent articles or the most recent articles from the article’s primary category.
- Optional: Choose the layout of the recirculation module (article river) that displays below an article. Choose the default river or a three-across grid.
Archive Styles
- Optional: Change the color of dividing border lines across Archive & Author pages.
- Optional: Archive Highlighted Post Background Color: Change the background color of the first article on Category & Tag pages. The default color is a very light gray.
- This also applies to the social sharing CTA in the single article footer, if it is present.
- This also applies to the social sharing CTA in the single article footer, if it is present.
- User Account Page Styles
- Optional: Change the color of dividing border lines on the My Account page.
- Optional: Change the color of dividing border lines on the My Account page.
Menus
You can create and edit menus by going to Appearance > Menus. For more detail see, How to Create and Configure Site Menus.
- Create your Main Menu (Display location: Main Nav – Menu 1)
- If you selected the “Wide” Main Menu format in the Appearance settings, create a secondary Main Menu. (Display location: Main Nav – Menu 2)
- If you selected the “Wide” Main Menu format in the Appearance settings, create a secondary Main Menu. (Display location: Main Nav – Menu 2)
- Create your Footer Menu (Display location: Footer Main)
- You can have up to four columns of footer menus.
- Display location: Footer Menu – Column Two, Footer Menu – Column Three, Footer Menu – Column Four
- Note: On the frontend of your site, the name of each footer menu displays along with the menu itself.
- You can have up to four columns of footer menus.
- You can have up to four columns of footer menus.
- Display location: Footer Menu – Column Two, Footer Menu – Column Three, Footer Menu – Column Four
- Display location: Footer Menu – Column Two, Footer Menu – Column Three, Footer Menu – Column Four
- Note: On the frontend of your site, the name of each footer menu displays along with the menu itself.
- Create your Legal Footer Menu (Display location: Footer Legal)
- Optional: Create a Topics Menu (Display location: Topics)
- This menu displays on Category & Tag pages and can also be added to your Homepage.
- Note: On the frontend of your site, the name of this menu displays along with the menu itself.
- This menu displays on Category & Tag pages and can also be added to your Homepage.
- Note: On the frontend of your site, the name of this menu displays along with the menu itself.
- Optional: Create a Nav Bar Menu (Display location: Nav Bar)
- This menu displays under your global header.
- This menu displays under your global header.